
Toddler’s Cereal Box Organizer

Cereal Box Toddler’s Organizer
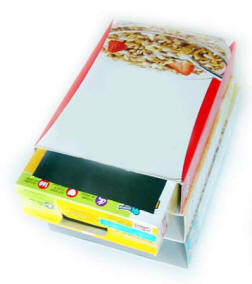
Get your toddlers started early on keeping things organized with this project. You’ll need 3-4 cereal boxes for this project…so save them up! Take 2 or three cereal boxes close in size and cut the small side flaps off. Then put one box on top of another box and fold the flaps over into the bottom box and tape inside. Then put another box on top and fold the flaps down into the box below that one. On the top box you can cut the other long flap if you like or tape it over the top.

You can either stop here (and let your toddler put all her drawings, scrap paper, or stickers in each “shelf”) or you can make a drawer out of another smaller cereal box. Take the smaller box and see if it will fit inside one of the other boxes. Tape the top closed. Now take some scissors and cut out a large rectangle on one side of the box. Cut a small half rectangle on one end and bend it out, for the drawer “knob”. Then slide it in and let your toddler decide what to put in the special drawer.
![]() Supplies Needed:
Supplies Needed:
– Empty cereal boxes ( 3 or 4)
– scissors
– tape
![]() Tips/Suggestions:
Tips/Suggestions:
– Let your toddler help with stacking the boxes and taping them together.
– When deciding what to put in the shelves, suggest that your toddler put all the blue paper in one and all the red paper in another one to review colors.
– You can always tape white paper to the outside of the cereal boxes and let your toddler decorate them too!