
Make a Paper Plate Notebook
 Paper plate notebook
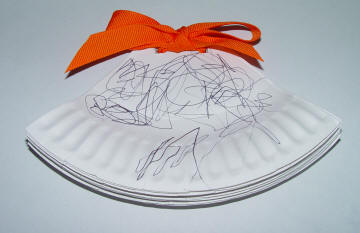
Here’s a fun activity for your toddler that will let her make a fun notebook to take on that next plane trip. Take about 3 or so paper plates and cut them in half. Then cut those pieces in half again, so that you have quarter pieces. Next, cut the top corner off of each piece. Then take a hole-puncher and punch two holes as shown in the photo. Lastly, take a piece of string or ribbon and tie all the pieces together. You now have a genuine paper plate notebook to color on with crayons, markers or fingers!
Supplies Needed:– paper plates
– scissors
– hole puncher
– ribbon
![]() Tips/Suggestions:
Tips/Suggestions:
– To punch the holes, start with one quarter piece and punch the holes where you want them to be, then place another quarter piece underneath and punch where the holes are on the top piece. This will help you make sure that the holes are in the same place on each piece and that they’ll line up.
– While your toddler draws/writes on the rippled part, talk about the difference of the flat part and the rippled part.